‘PICAS’ stands for Paper Insulated Corrugated Aluminium Sheath cable. These 11kV cables feature a corrugated aluminium sheath, to improve flexibility, the corrugation valleys are filled with bitumen to prevent moisture penetrating along the underside of the outer red PVC sheath, which is added for corrosion protection.
Removing the outer PVC sheath and Bitumen from PICAS Cable
 Firstly, the red oversheath should be heated gently with a soft-flame gas torch. Care should be taken to avoid overheating the PVC as this will produce toxic fumes and may even burn.
Once the sheath is warm, but not too hot to touch, it can be cut using a flat bladed cable knife. Start with a circumferential cut then make a lengthwise cut along the cable with the knife to avoid piercing the aluminium. Now you can remove the outer sheath.
With the PVC sheath removed, the bitumen compound can now be cleaned from the cable. Starting from the open end, using solvent wipes and heat from a gas torch, the compound should be thoroughly cleaned from the surface of the aluminium. Care should be taken as to not overheat the cable, doing so could lead to early joint or termination failure.
Removing the Aluminium Sheath From PICAS Cable
Always wear protective gloves when removing the aluminium sheath, the metal can be sharp.
Using a Chinagraph pencil, mark the aluminium sheath at the removal point as indicated on the relevant jointing instruction. If the mark falls between one of the valleys, move the mark to the next crest towards the cut end of the cable.
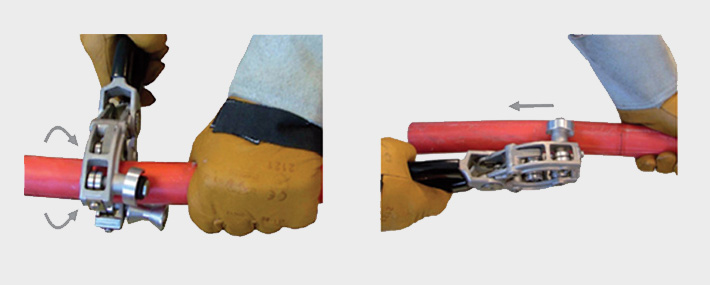
 The aluminium sheath of the PICAS 11kV cable can be removed with a sheath removal tool, which resembles a pipe cutter but has a special twin cutting wheel at one end of the jaw and two positioning rollers at the other end. Always inspect your cable jointing and sheath removal tools as a cutting wheel in bad condition will have to be replaced prior to use to avoid unnecessary damage to the cable.
Apply the tool to the cable with the cutting wheel spanning a corrugation crest. Tighten the tool until the cutter just indents the crest, and then rotate to cut the metal. Gently increasing the cutting pressure by closing the screw control.
The aluminium should be removed in sections, no longer than 250mm each.
With the cores exposed, the cable is now ready for use with the required MV joint or termination.
For more information on cable stripping procedures and tools, please contact us. Learn more about our offer of power cable lugs.
If you found this article helpful or interesting, please share it!


