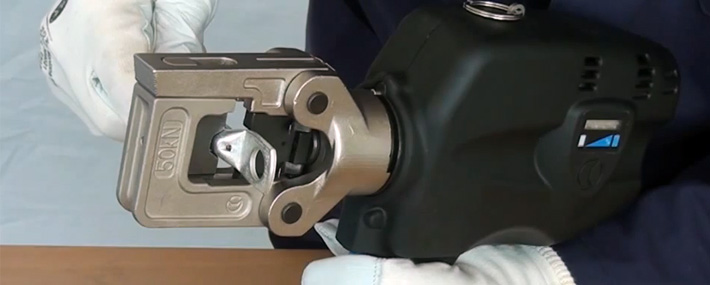
There is more to crimping a cable than simply affixing a lug to the conductor. The BS7609 standard highlights the code of practice for installation and inspection of uninsulated compression and mechanical connectors for power cables with copper or aluminium conductors.
The purpose of this code of practice is to give guidance to manufacturers and electrical contractors who use compression connectors and terminals to enable cables to be terminated in a safe, consistent and efficient manner following good engineering practices.
The following steps provide simple instructions on how to crimp a cable lug to BS7609.
How To Preform The Perfect Crimp?
1. Choose a supplier that provides crimp tooling, die sets and cable lugs which are compatiable and designed to work together to give the optimum crimping performance.
2. Each lug/terminal should have a reference clearly marked on the palm or barrel which enables the user to easily verify that it is the correct size and type for the conductor it is due to be used on.The crimp lug should also feature the manufacturers name or logo to enable the use of the correct tooling and die set, which can be selected from their published die set selector charts.
3. Prepare the aluminium or copper conductor for crimping by stripping back the insulation to a length equal to that of the lug barrel. This ensures that no insulation can be trapped in the barrel of the lug when assembled.
4. Insert the conductor into the terminal barrel. If applicable, use the inspection hole to check the conductor is fully inserted.
5. Perform the crimp paying careful attention to the positioning of the die on the barrel and, if multiple compression actions are required, in which sequence they should be performed.If using a hydraulic crimping tool, making sure the correct tool is used with a compatible die set is vital. Care should also be taken to keep the tool well maintained, working properly and has an up to date calibration certificate. More information can be found in our hydraulic tool maintenance guide.
6. Once the crimp(s) have been performed, check the completed termination for:
a) No insulation is trapped in the barrel
b) Check the inspection hole to confirm the conductor has been fully inserted
c) Over-crimping – make sure the barrel is not over crimped causing excessive stress on the conductor and flash or burrs on the lug
d) Under crimping – No air voids should be found between the strands of the conductor. They should be tightly compacted to ensure maximum performance
Over Crimped and Under Crimped Lugs
The below image shows an under crimped lug (left) and an over crimped lug (right). Both these incorrectly crimped terminals can cause overheating and ultimately lead to termination failure or fire. The over crimped lug is easily identifiable by the ‘ears’ or ‘wings’ of created on the barrel of the terminal. The under crimped lug is identifiable by inspection of the lug and conductors.
 |
Under Crimped Lug |
Over Crimped Lug |
For more information on our range of hydraulic and battery powered crimping tools, please contact our Tooling Department.
If you found this article helpful or interesting, please share it!


